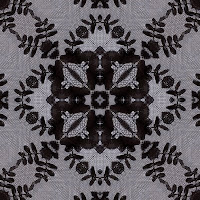
The P program has endless filters that you can play and be happy with. But you can go beyond and create your own seamless pattens. Note that the pattern generator filter in filters creates patterns but you can see where the tiles meet, therefore they are not seamless.
There are many ways of creating a seamless pattern.
You can start from scratch with an image do the tessellations and build it up.
There are also plug ins that do all the dirty work for you, so why not take advantage.
i'll show you how to use a nice little plug in that helps you with the task and it works with CS onwards. This mini tute presupposes you know the basics of how to handle the P program.
- First go to mehdi and download kaleidoscope.2 plug in. While there browse around as there are many cool and useful plugs ins.
- save it in a folder in filters.
- go to file new and make it 300x300 px.
- then you can draw simple shapes or scan an image.
We'll concentrate on a scan here to narrow down the possibilities into a manageable tute.
- get your image and copy it to the 300x300 px file you created.
- make any adjustment you wish.
- flatten layers.
- go to filters and look for kaleidoscope.click to open
- change settings by working with the sliders until you find something you like.
- adjust pattern size to desired by clicking the bar under the picture.
- click save.
- check pattern by creating a new file let's say 800px
- go to define pattern in the edit menu and click.
- use the food fill .voila!! seamless pattern background!
i'm presently working with lace and here's a rough run of my process in pictures.
(apologies for the last picture.a glitch prevents me from uploading one w/out th white border (GRRRR)
This is the base for many surface design techniques.
You can then print the background to any substrate, make a thermo fax screen or simplify the image and carve stamps.
Hope this is useful to ya'll :-)
neki desu
view CCLicense
What a great toy! I followed your instructions and found a wonderful tool. I have been a lover of mirror caleidoscopes, but can't use them like I did at a younger age due to old age hyperopia. Thanks for the link!
ReplyDeletewell i think i need to get photo shop first.
ReplyDeletehaha jude- yea
ReplyDeletewell, i do have it and will have to give this a go- will let ya know! thanks neki!!
darn! that plugin isn't for Macs. have to look for another one..
ReplyDeleteGreat tutorial, thank you! I would love to try it but I'm on a Mac too - will be looking out for something like it
ReplyDelete